Transition from accounting 2.0 to 3.0 non-standard
The transition from edition 2.0 of the "Enterprise Accounting" configuration to edition 3.0 is carried out by updating. To do this, you need to install the update distribution kit for edition 3.0 on your local computer, prepare the information base and update it to the new edition.
Installing the update distribution kit for edition 3.0 on a local computer
To update, a special distribution kit for updating the "Enterprise Accounting" configuration to version 3.0 is required; it can be downloaded from the 1C company's user website.
Configuration versions 2.0 and 3.0 are interconnected; updating can only be performed to a specific version of Enterprise Accounting 3.0. In order to determine the required version of the "Enterprise Accounting, edition 3.0" configuration, you must first determine the version of the infobase configuration that you plan to update to edition 3.0. You can determine the version of the infobase from the menu "Help" - "About the program"

In the window that opens, in the “Configuration” item, the release number of the current configuration, edition 2.0, will be displayed. This version must be found in the version table in the “Version Update” column on the user website in the “Enterprise Accounting, Edition 3.0” section (http://users.v8.1c.ru/project.jsp?id=Accounting30). The "Version number" column will indicate the release number of "Enterprise Accounting, Rev. 3.0", to which you can update the information base of edition 2.0.

Open the page for the selected release.
NOTE: For your version of Revision 2.0 configuration, there may be multiple Revision 3.0 versions available for upgrade. In this case, we recommend choosing the latest version.

On this page you need to select the item "Update distribution for the transition from edition 2.0", download the file to your local computer and run it.
The link opens a self-extracting archive. You need to select a folder on your local computer to save the distribution and click the “Extract” button. To install the update, you need to run the Setup.exe file.


Preparing the "Enterprise Accounting 2.0" information base for updating
Before upgrading to a new edition, you must make a backup copy. When using the file version of 1C:Enterprise 8, this can be done by copying the 1CV8.1CD file to a separate directory. When using the client-server version of 1C:Enterprise 8, a backup copy can be made using the SQL server. Regardless of the 1C:Enterprise 8 option used, a backup copy can be created using the infobase upload mode. To do this, you need to launch the infobase in the "Configurator" mode and in the "Administration" menu select the "Download infobase" item. In the dialog that opens, just specify the name of the file into which the data will be written.
If users have been created in the information base "Enterprise Accounting, edition 2.0", then for the user on whose behalf the update will be performed, you need to install the additional role "System Administrator (for transition to edition 3.0)".

This can be done by selecting the “Administration” menu item in the configurator, then “Users” and open the desired user in the list.
On the "Other" tab, you need to set the flag opposite the "System Administrator (to switch to version 3.0)" item.

This user must also be assigned the Full Rights role.
After clicking "OK", the changes made will be saved. The transition to edition 3.0 must be carried out only on behalf of this infobase user.
Update to version 3.0
After this, you can begin updating the information base. To do this, select "Configuration - Support - Update configuration". If this menu item is not available, then you must first select “Configuration – Open configuration”. Updating the database configuration is only possible if no other users are connected to the infobase, that is, exclusive mode is required.

The switch should be left in the "Search for available updates (recommended)" position and click "Next"

In the next window you need to click the “Next” button again.

The process of searching for updates for the current version will begin. If the search is successful, the configuration version version 3.0 will be displayed in the update selection window

Select the 3.0 edition configuration version and click Finish
NOTE: The list of versions for updating will display all versions to which you can update your infobase, including versions 2.0.
Click "Finish" and a window will appear with information about updating to the new version of the configuration.

After familiarizing yourself with the update procedure, you need to select the “Continue update” button. The Update Configuration window will be displayed. Check that the versions listed there match the current and new configuration. Click the "OK" button and the update procedure will be launched, upon completion of which you will be prompted to update the database configuration.

Click "Yes". Preparations will be made for updating the database configuration and a window will appear with changes in the database structure.

After clicking the "Accept" button, the necessary changes will be made to the database structure. When asked to accept the changes, you must answer with consent and wait until the changes are accepted.
After updating the infobase is complete, you need to open the infobase in Enterprise mode on behalf of the user who performed the update.
If there were no users in the infobase before, then upon first launch you will be asked to create a user named Administrator and restart the application.
At the first launch, data processing will be performed, which may take considerable time. You must wait for this processing to complete.
Once the update is complete, the main program window will open.

If infobase users were entered in the "Enterprise Accounting 2.0" configuration, then after switching to "Enterprise Accounting 3.0" all users will need to re-establish access rights to the infobase. To do this, go to the "Administration" section and select the "Users" link. A list of users will open.

For a user who needs to be granted access to the information base, you need to set an access profile that corresponds to his job responsibilities.
You can install a profile by opening the user card and selecting “Access Rights” from the “Go” menu.

In the form that opens, you need to check the boxes for the required profiles.

If you specify the "Administrator" profile, the user will have full rights to the information base. The View Only profile allows you to view infobase data, but cannot change it.
The Accountant profile is the main working role; a user with this profile can both view information base data and edit it. The rights of the “Chief Accountant” profile are similar to the “Accountant” profile, but have some additional rights to edit reference information and month-end closing procedures.
After this, the information base "Enterprise Accounting 3.0" is ready for use.
Setting up document numbering
The method of numbering documents in edition 3.0 has been changed compared to edition 2.0. The number consists of four prefix characters and the number itself.

The first two characters of the prefix identify the organization and are specified in the organization directory. If the organization prefix is not set, then the value is 00.

The third and fourth characters determine the node number when using a distributed infobase or when working in the 1C:Enterprise via Internet service, if several infobases have been created for one account. Default is 00.
To correctly number documents, you must change the number of the first document of each type created so that it continues the numbering from the old version. For example, the last document number “Sales of goods and services” was 00000000131. After updating to version 3.0, the first document entered will have the number 0000-000001. To maintain the correct numbering, you must change the number in this document to 0000-000132. In the future, all entered documents “Sales of goods and services” will be assigned the correct number.
In this case, the numbers of documents transferred from edition 2.0 will be displayed correctly in printed forms (without prefixes and leading zeros).
Setting up synchronization after migrating from edition 2.0 to edition 3.0
After updating "Enterprise Accounting" to edition 3.0, the synchronization settings with the configurations of "1C: Trade Management 8" editions 10.3 and 11, "1C: Small Firm Management 8" or "1C: Retail 8" edition 2.0 will be automatically converted. To continue the exchange, you must also convert the settings in the configurations with which you are synchronizing. To do this, you need to use the "Convert exchanges with BP 2.0.epf" processing, which is included in the distribution. To continue the exchange with "1C: Trade Management 8" edition 10.3 from "1C: Accounting 8" edition 3.0, you will need to transfer additional synchronization settings by uploading to a file.
Implementation and maintenance services
Transition from edition 2.0 of 1C:Accounting 8 to edition 3.0
Unlike the difficult transition from 1.6 to 2.0, when it was necessary to transfer the remains to a new database, the transition to edition 3.0 is relatively painless - for standard configurations it is performed as a configuration update using the Configurator.
When is the best time to switch to 1C:Accounting 3.0?
It is better to make the transition to 1C Accounting edition 3.0 immediately after submitting annual or quarterly reports, so that the next reports can be prepared in edition 3.0. Since the transition is carried out through an update, all directories and all documents that were introduced in the new reporting period will smoothly flow into edition 3.0.
Do I need to buy a new version?
No, you do not need to pay specially for an update license. The new edition is available to all ITS subscribers at no additional charge.
Is there a 3.0 edition for 1C: Accounting CORP?
The final version of edition 3.0 of the configuration "Accounting for an enterprise CORP" 3.0 was released at the end of December 2012.
The procedure for switching from 2.0 is the same as in PROF Accounting.
What is needed to upgrade to version 3.0?
To update configuration 2.0 of "Accounting PROF" to edition 3.0, you must use the current version of the configuration and a special update file included in the distribution kit "1C: Accounting 3.0".
Edition 3.0 is provided to registered users of previous editions of the Enterprise Accounting configuration as part of information technology support (ITS).
Is it possible to carry out the update procedure yourself?
A user with 1C:Accounting 8 administration skills can carry out the data transfer independently, without the involvement of specialists.
You can order services for the transition to "1C: Accounting 3.0" from our company.
What problems might you encounter during the transition?
Edition 2.0 is a “regular application”, edition 3.0 is a “managed application”. To make a new edition, programmers had to completely rewrite the procedures regarding the user interface. Therefore, you may encounter the following situations:
- If your standard configuration contains external processing and reports made by your own or third-party programmers, these processing will not work with the new edition.
- If your standard configuration has been modified, it cannot be updated to 3.0 without losing the modifications.
Sandbox
recruit July 8, 2013 at 12:33 pmTransition to edition 3.0 of the enterprise accounting configuration
This is the name of the instructions on the “ITS PROF” disk in the new release materials section. Having tried to do the tricks that are described in this guide, you should have your own enterprise accounting (BP) 2.0 but with managed forms and, apparently, card games and slutty women. All actions will be performed with the file version of the database.
I specifically waited for the disk with ITS, and discovered that the instructions published in it were not true, although they were in the updated section. Let's try to make this transition ourselves.
ITS disk screen
The picture above shows the procedure, and everything seems to be simple, but only on the ITS website in the BP 3.0 section, you will not find versions starting with two.
Screenshot of a real ITS website
Thus, the very first paragraph of the instructions leads the user to a dead end. It will not be possible to update to another, date-matching or latest version. The pre-existing update distribution from version 2.0 is not listed. But there is a complete distribution kit containing the necessary updates. Download this distribution and install it in the templates directory. The “trick” of this distribution is that it contains the file “1Cv8.cf”, which is what we need. With its help, we will create a clean BP 3.0 configuration and load our database with BP 2.0 into it.
We install platform 8.3, note the thin client file version, and web server extension modules (in order to play around with the “new” goodies in accounting). Open the “old” (8.2) configurator, and add the rights “System Administrator (for transition to revision 3.0)” to the user under whom we will update. We unload the database, close the configurator and open the “fresh” one (8.3). We create a new database in it, from a template, with version 3.0, this template appeared when we installed the full distribution. Open the created database and download the download of our database. This operation may take a long time. After the upload is completed, open the database (not from the configurator) and complete the update (this operation also takes a lot of time). I recommend compressing the database, since after these steps it almost doubled.
If your configuration did not contain changes (additions), then the update will most likely take place without errors, but in the case of 1C you cannot be completely sure of anything.
All. You can open the database with a thin client, publish it on a WEB server and launch 1C through a browser.
P.S:
1. Do not use 1C Denwer as a web server.
2. Publish on the web server the database that is physically located on it.
These tips will help you publish 1C on a web server on the first try.
Tags: system administration, 1s enterprise 8, accounting
This article is not subject to comment because its author is not yet
The transition to version 3.0 of the 1C configuration: Accounting in housing and communal services management companies, homeowners' associations and housing cooperatives is carried out by simply updating the configuration. The only difference is that in setting up the administrator role you must specify the “System Administrator” checkbox (to upgrade to version 3.0)
IMPORTANT: Before updating, you must make a copy of the database according to the instructions.
1. Update file ed. 3.0 You can download from the developer's website.
2. To gain access to a closed section of the site, you must send a request to our email address [email protected]
The request must include the following mandatory details:
- Name of the organization that uses the VDGB software product;
- Name of the software product “VDGB”;
- Registration number and version of the VDGB software product;
- Registration number of the 1C:Enterprise platform.
3. Having gained access to the site, download the file “3.0.ХХ.Х_setup.rar”.
4. Unpack the file; the unpacked archive will contain the following list of files:
5. Run the “setup.exe” file.
6. The Setup Configuration Wizard will open. Click the “Next” button.

7. In the next window, indicate the path where the update template will be located and click the “Next” button:

8. Wait until the installation of the update template is completed and click the “Finish” button:

9. We go to your information base in edition 2.0 of platform version 8.3.4 in the “Configurator” mode.

10. Open the configuration: Configuration – Open configuration.

11. In order for the changes to take effect from edition 2.0 to edition 3.0, you must check the system administrator checkbox for edition 3.0 in the user settings (“ Administration – Users – Administrator – System administrator (for transition to edition 3.0)»)

12. After this, we begin to perform the update: “ Configuration – Support – Update configuration».
13. Select “Select update file”, click “Next”:

14. Specify the update file “C:\Program Files (x86)\1cv82\tmplts\VDGB\TSZH \3_0_ХХ_Х\1Cv8.cf” and click “Finish”:

15. A table will open with a brief description of the current and future configurations, click “OK”:

17. After the update, a window with a question will appear, click “Yes”:

18. In the “Reorganization of information” form, click “Accept”:

19. We see that your configuration has been successfully updated. On the menu " Reference – About the program", you can see which version was updated to.
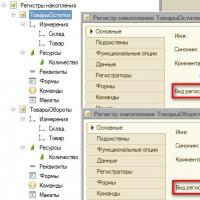 List of values of accumulation registers 1s
 Advance calculation in 1s 8
 GPC agreements Reception for GPC in 1s
 Month closing settings How to close a period in UP
 Specialist consultations
 Accounting for fuel and lubricants in 1C: instructions for accountants Write-off of fuel and lubricants 1s 8
 Issue an invoice in the 1s 8 program